Tuesday, December 31, 2013

Craft Closet Chaos

Everyone knows that the two biggest New Year's Resolutions are usually to get organized or to exercise, and I'll do just about anything to avoid exercising...so I'm organizing!

I have a nice big closet that I keep most of my crafting supplies in (this does not include my sewing supplies, that would have to be one massive closet).

I had shoved a big old hand me down armoire in there and packed it up FULL of supplies.  I used bins from another thing I had and then whatever other boxes and and small organizing tools I had on hand to try to keep things in order.


And it was always relatively orderly.  The big pain in the butt was that the doors made it very awkward to move around in there.


Especially with all the stuff I had on the floor just opposite the armoire~

So, I found some cubbies on sale at a liquidation store and bought two sets! 1 has 6 cubbies and the other one has 9.  I thought that surely to goodness I should be able to fit all of my stuff into 15 cubbies!

craft room chaos, messy craft room

The photo above was mid chaos.  I had to take everything out of the armoire to get it out of the closet so that I could put the new shelving into the closet.  This was about the point when I decided that I'm not allowed to purchase any new crafting supplies for awhile~

But in the end, the chaos was worth it....


The choir of angels sing! Ahhhh!  So much better!

I will admit that I still have some work to do.  Some drawers look like this:

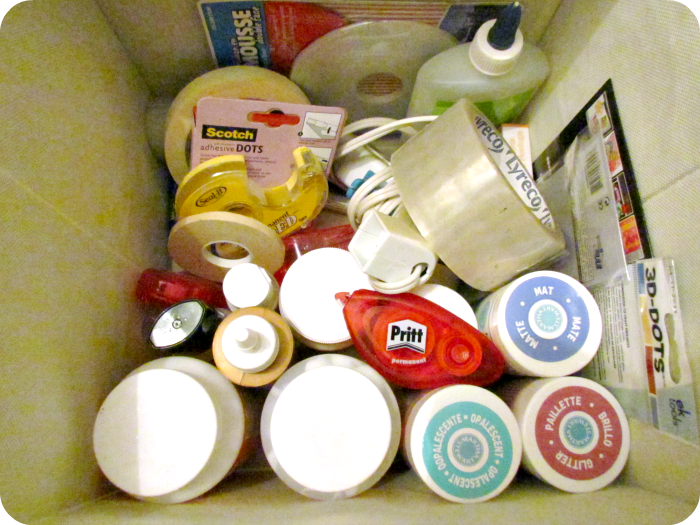
Nicely organized adhesives
And some drawers still look like this:

A little bit of everything
(cross stitching patterns, hand made paper beads, tacks,
pipe cleaners, pencil crayons, punches, brayer, etc, etc, etc.)
And I do have to make labels because I'm having a hard time remembering what's in each bin.  But it will all come together soon enough...and it's not even 2014 yet!

It all fits!  With room to spare!

So which one are you doing this year?  Organizing or exercising?  Leave a comment below~


Monday, December 30, 2013

Movie Monday-New Years Make-Up


I have to admit, I probably watch more make-up guru's on YouTube than I do crafters.  And Lisa Eldridge is one of the best.  She's a professional make-up artist who not only shows you how to achieve amazing looks, but tells you why she uses the techniques that she does and gives all kinds of helpful tips.

In this video she shows you how to create an Old Hollywood Inspired look perfect for those of you who are lucky enough to have a night out on the town planned for tomorrow~


Lisa has a passion for make-up and and depth of knowledge not normally seen with YouTubers.  She works with celebrities and top models on a regular basis and is definitely worth checking out for more inspiring looks.

Saturday, December 28, 2013

Embossed Tin Candle Wraps

One last craft tutorial to round out 2013~

embossed tin, candle wraps, tin candles

Here's what you need to cover up your own candles:


Supplies:
-Tin foil
-embossing folder
-straight edge, craft knife, cutting mat
-candles
-glue runner (not shown)
-optional: rolling pin, measuring tape
NOTE: YOU DO NOT NEED AN EMBOSSING MACHINE (LIKE A SIZZIX OR CUTTLEBUG) TO DO THIS CRAFT :)

Steps:
1) Cut a piece of tin foil to fit the height of your candle.  I don't have much luck getting a straight edges with the built in cutter so instead very lightly score a straight line and then tear along your straight edge.  If you try to cut with a knife you'll still get ragged edges, gently ripping is the way to go.


2) Place your foil inside your embossing folder and either press with your hands or roll over it with a rolling pin.  I found more consistent results with the rolling pin method.

Try not to press too hard
or you'll make holes in your foil
instead of just embossing it.
3) Just move your piece of foil along and repeat until you've embossed the entire piece.  Make sure to overlap the edges just slightly to avoid any gaps.


4) Run a line of glue along one short edge.


5) Now just wrap the foil around your candle (or jar), press the edges together to seal the glue and you're done!


If you have trouble getting a nice clean edge, just fold it over like I did at the top.  If you have a funny shaped candle you can easily mold the foil to your container.

I experimented a bit and sponged some black paint onto the foil to see if it would bring out the embossing pattern a bit.


My technique needs some work but I don't mind it.


Did you get all of the crafts finished that you wanted to do this year?  Don't worry, there's 365 days left next year to finish up that 'to do' list!

Happy New Year everyone~

Wednesday, December 25, 2013

Merry Christmas Day


Resistance is futile~


Hope you're all having a wonderful day~

Monday, December 23, 2013

Movie Monday - MERRY CHRISTMAS


Hope you all have a wonderful holiday this week!


You too Dolly!

Saturday, December 21, 2013

Glitter Tags

I've got a room full of wrapped presents with no tags on them.  I hope I can remember whose parcels are whose by the time I put on these pretty new tags I've made...or there are going to be some very surprised faces on Christmas morning!


Want to find out how I got such crisp fine lines in my glitter?  Keep reading to find out!

Here's what you need to make your own Quick and Easy Glitter Tags:

Materials
-cardstock
-glitter
-scotch tape, scissors

Steps:
1) I used my Silhouette to cut out my tags and do the writing for me.  While I was at it, I got the Silhouette to punch out Christmassy shapes on each tag.  If you don't have a cutting machine you could use paper punches.
I used to be called Tammy when I was a kid,
my family are the only ones who use that name now though~
2) Stick small strips of tape onto the back of your tag so that the sticky side is facing the front through your cut out shape.  (none of my photos for this step turned out but I'm pretty sure you can figure it out)

3) Pour on the glitter!  Tap it lightly into your cut out shape.


4) Just tap off the excess onto a piece of scrap paper (so that you can put back into your glitter container), and you're done!


I love how detailed I can get with the glitter, check out the deer antlers up top!  They have a bit of a translucent look to them too, which reminds me of stained glass.


Just stick them on your gifts with Christmas stickers, twine, or tape.  Now, I must run while I still remember where to put these tags.

Are you still Christmas shopping or are you all wrapped up and ready to go?  Only a few more days left!!  Leave a comment below~

Thursday, December 19, 2013

Tell a Tale: The Handmaid and The Carpenter


Something for the season...

The Handmaid and the Carpenter

Summary (from Goodreads)In this wonderful novel about love and trust, hope and belief, Elizabeth Berg, the bestselling author of We Are All Welcome Here and The Year of Pleasures, transports us to Nazareth in biblical times to reimagine the events of the classic Christmas story.

We see Mary–young, strong, and inquisitive–as she first meets Joseph, a serious-minded young carpenter who is steadfastly devoted to the religious traditions of their people. The two become betrothed, but are soon faced with an unexpected pregnancy. Aided by a great and abiding love, they endure challenges to their relationship as well as threats to their lives as they come to terms with the mysterious circumstances surrounding the birth of their child, Jesus. For Mary, the pregnancy is a divine miracle and a privilege. For Joseph, it is an ongoing test not only of his courage but of his faith–in his wife as well as in his God. 

Exquisitely written and imbued with the truthful emotions and richness of detail that have earned Elizabeth Berg a devoted readership, The Handmaid and the Carpenter explores lives touched profoundly by miracles large and small. This powerful and moving novel is destined to become a classic.

Review: This is not the typical type of novel that I normally read, but I love Elizabeth Berg so I gave it a go.

I would not recommend this book for anyone who is steadfast in the literal translation of the bible.  However, if you are open to interpretation insomuch that the meaning of the story stays intact, then you might enjoy this little novel, and at only 176 pages it really is "little".

The intention of the book is to humanize the characters in the story as old as time itself.  We meet Mary and Joseph as young adults, who have a curiosity and foreboding sense of responsibility that all young adults possess.  They question the ways of the world around them and learn to accept their roles through their faith, in God and in each other.

Although this novel is set in history, I wouldn't really characterize it as a historical novel.  I think it was more of an exercise for Elizabeth Berg to capture an essence of the people involved in the birth of Jesus, outside of what we have already been taught.

As someone who is not a regular church-goer or philosophical student of the bible, I won't even pretend to understand or catch any of the subtle intricacies that Berg hits or misses.  Instead, I just take this as it is presented, another perspective on a story that gives us all hope no matter where in the world we live and a reminder of what Christmas is actually about...family, friends, love, and faith~

Merry Christmas everyone~

Wednesday, December 18, 2013

Poinsettia Card

This card was so easy to make I'm almost embarrassed to do a post on it but it turned out so pretty I just had to show you.

I used Silhouette design# 51896, which is on sale for only 50 cents right now!


You could rough up the edges and ink them but just cutting it out and putting it together is just as nice~


The only thing I did was drench the cut outs in glitter mist.

Only a week to go...are you ready for the big day yet???

Tuesday, December 17, 2013

Odds & Ends from Wholeport

The year is almost up and I still haven't shown you all of the fun stuff I've gotten from Wholeport over the past little while.

First off I got all sorts of fun Christmas stickers to use on my gifts.


I love the Snowman ones.  Underneath they say "Continue a charming smile on your face."  I think they're so funny.

I also got a resin mold that looks like jewels.


I got the bright idea to add just a drop of food colouring to the water.


Now I'm not so sure it was all that bright.  While the food colouring didn't stain the mold, which I was afraid of, it did stain my fingers when I got the ice cubes out (they came out super easy by the way).  And now they're turning my Ginger Ale a funny green colour.  I think I'll just stick to straight water next time.


I've also gotten all sorts of beautiful cotton fabric.  I know I said I wasn't going to purchase any more craft or sewing supplies but these are all going towards Christmas gifts.  I'm on my 4th pair of PJ pants...only 3 more to go!

The top one is a Vera Bradely print~
The great thing about Wholeport quilting cottons is that the often come in 150cm (60") widths.  This means, with a little creativity (ie: bottom cuffs for anyone who's a little on the tallish side), you can get a whole pair of PJ pants out of just one metre of fabric!  I still have to cut out a pair using this fabric too~

Wholeport has more than just great prices on crafting supplies.  Head on over there and see what else you can find!

*This post is sponsored by Wholeport however I have recieved no compensation other than the products shown and all opinions are my own.

Monday, December 16, 2013

Movie Monday - Assembly Line Christmas Cards

Today you get two for one!
I know some of you out there are kicking yourself because you still don't have your Christmas cards done.  But there's hope!  Take a look at how quick and easy Kim from Stamping Imperfections makes a whole pile of cards in no time at all~


Now you have no excuses...and neither do I~

I just love Stamping Up! demonstrators.  I can very easily get lost on YouTube taking in all of their different amazing ideas.  Check out Kim's channel and blog for more great projects.


And if you need more ideas....

Catherine Pooler posted a series of great quick and easy to make Christmas card ideas a few years ago, but they're just as handy now and they were back then.


I don't know why, but I'm always a little surprised when someone makes it big and they continue to do their own videos and blog posts and Catherine is a pretty big deal.  I think I even have an app with her name on it on my iPad.  Check out her channel for loads more tips, tricks, and awesome ideas for the whole year~

Saturday, December 14, 2013

Christmas Napkin Rings

Every year my family comes to my house on Christmas Eve for a pot luck dinner.  Everyone brings whatever they like and we place it all on my little glass dining room table, hoping it won't shatter under the weight of all the tasty dishes.

But this year I bought a sturdy proper wooden dining table (with an extension that will seat 8-10) off of Kijiji (like Craigslist) for a whopping $25. I'm so excited to have a real sit down meal where people don't have to try to balance their plate on their knees while reaching down to the floor to pick up their wine goblet.

This means I get to set a proper table too!  Which means we need real napkins and napkin rings to put them in!!
 
DIY Napkin Rings, paper napkin rings

Luckily I found a whole set of beautiful damask napkins in my Christmas stuff that I didn't even know I had.  The rest I decided to make...all with things in my own craft closet (still haven't bought any craft supplies!).

Here's what you need to make your own and to use up a few things that are probably laying around your house.

Materials:
-Paper roll from Christmas gift wrap or paper towel
-pretty paper or scrap gift wrap
-Mod Podge, 2 sided tape, sponge brush, craft knife
-glitter and other embellishments
-ruler and pencil (not shown)

Steps:
1) Measure and mark your paper roll at 1.25".


2) Cut with a craft knife, making as many pieces as you need.


3) Cut your paper to fit your little rolls.  I cut mine 1.25" X 6".  Cut as many strips as you need.

4) Sponge on some Mod Podge and place your paper strip on top.  Use some clips to secure it while it dries.


5) Once everything is dry, take your clips off and place a strip of double sided tape along one edge of your rolls.


6) Dip that edge into a little pile of glitter and coat it as best you can.  This is the best method to getting a nice straight line along the inside edge.


7) If you don't want your dinner guests to be covered in glitter you need to seal it in with a coat of Mod Podge.


8) Let your rings sit for about 1-2 hours to dry completely.  Now just add a rosette or other embellishment for a little decoration.


Place your napkins inside and you're done!


I considered making rosettes with each person's name on it so that everyone would know where to sit but I already have wine glasses that we use for that so I didn't want to overdo it.

Do you set a formal or casual table for your family at Christmas time?  Leave a comment below~

Linkwithin

Related Posts Plugin for WordPress, Blogger...